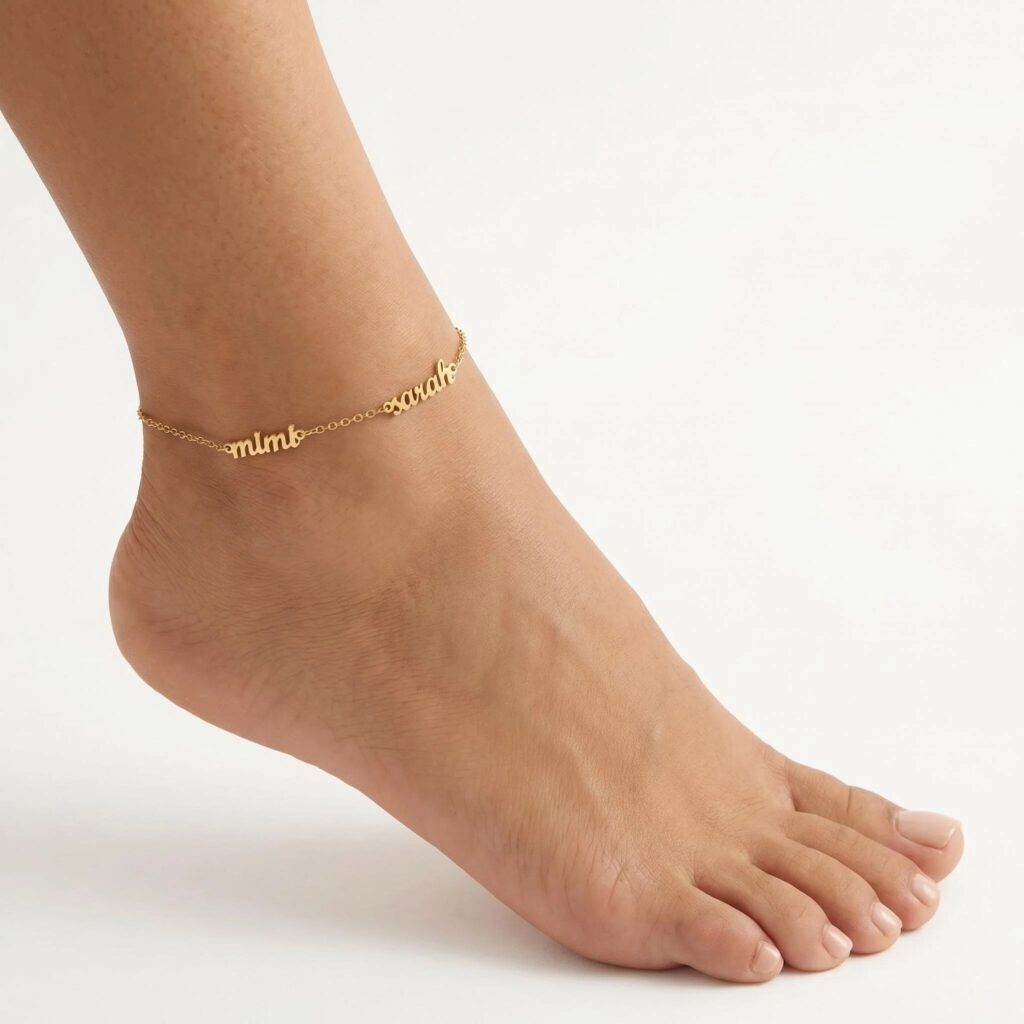
Anklet Tan Line — Why It’s Trending and How to Get One
An anklet tan line is the pale stripe left on your ankle when an anklet blocks the sun while the surrounding skin tans. The trend is growing because the visual contrast is flattering, the imprint carries a sense of summer lifestyle, and — with a name anklet — the tan line leaves a shape that’s specifically yours.
To get one: wear a fine chain anklet during sun exposure for several days. Thin chains and flat nameplates produce the clearest lines. Consistent daily exposure of 4 to 6 hours accelerates the process; proper skin preparation makes the contrast more defined.
A fine gold chain with your name engraved doesn’t just look good on the wrist — it leaves an outline in your skin that’s as personal as your signature. Waterproof, tarnish-resistant, free engraving on every order.
Shop Name Anklets →- What is an anklet tan line — and why is everyone after one?
- The aesthetic logic: why does it actually look good?
- Which anklet makes the best tan line?
- How to get an anklet tan line: the practical guide
- How it looks on different skin tones
- Maintaining skin while you develop the tan
- How to photograph and show it off
- Frequently asked questions
What Is an Anklet Tan Line — and Why Is Everyone After One?
An anklet tan line is exactly what it sounds like: a lighter stripe or shape on the ankle left behind after wearing an anklet during sun exposure. The anklet sits against the skin and blocks UV rays, while the surrounding area tans. When the anklet comes off, the contrast between the tanned skin and the protected area creates a visible imprint of the jewellery — an outline that persists for weeks after the piece is removed.
The trend has been building steadily on TikTok and Pinterest throughout 2025 and 2026. What’s driving it isn’t novelty — anklet tan lines have existed as long as people have worn anklets at the beach — but rather a shift in how they’re perceived. What was once an accidental byproduct of wearing jewellery in the sun is now being actively sought and carefully documented. The hashtag has generated millions of views across platforms, and the aesthetic conversation around it is specific: not all tan lines are equal, and the type of anklet you wear determines the quality of the imprint you get.
The shift: People used to try to avoid tan lines. Now they’re trying to get the right one. The anklet tan line occupies a specific aesthetic register — it signals outdoor life, deliberate jewellery choices, and a version of beauty that looks earned rather than applied.
The Aesthetic Logic — Why Does It Actually Look Good?
The anklet tan line has a specific visual appeal that’s worth understanding, because understanding it helps you create a better one. It’s not random — four distinct principles explain why this particular tan line has become desirable when most others are avoided.
The line between tanned and untanned skin creates a visible edge — and edges create visual structure. The contrast at the ankle draws the eye to a part of the body that most people don’t think of as visually interesting, and suddenly makes it so. The more defined the edge (from a finer chain), the more deliberate and precise the effect reads.
A tan line implies time spent outdoors — at the beach, poolside, in the sun. It’s an earned mark rather than an applied one, which gives it a naturalness that no cosmetic equivalent can replicate. The anklet tan line specifically says: this person has been somewhere worth being, and they wore jewellery while they were there.
The tan line is hidden when the anklet is on and revealed when it comes off. This concealment-and-reveal quality is part of what makes it compelling — it’s a detail that rewards closeness and attention. The anklet is decorative; the tan line it creates is intimate. Together they operate on two different levels of visibility.
No two anklet tan lines are exactly alike because no two people tan at the same rate or wear the same anklet in the same position. A name anklet takes this further — the tan line it creates is the shape of your name in your skin. That’s about as personal as a mark can get.
“This isn’t an accident. It’s a deliberate mark — the sun recording the fact that you wore something there, every day, all summer.”

Which Anklet Makes the Best Tan Line?
Not all anklets produce equally good tan lines. The quality of the imprint depends on the chain width, the pendant shape, and how consistently the piece sits against the skin. Here’s how different styles compare:
| Anklet Style | Tan Line Effect | Definition | Best For |
|---|---|---|---|
| Custom Name Anklet ✦ Recommended | A fine chain line plus the readable outline of your name — a two-element imprint that’s completely personal | Excellent — letters in the nameplate create distinct edges | Anyone who wants a tan line that’s unmistakably theirs |
| Fine Chain Only Classic | A single clean pale stripe around the ankle — the most minimal and precise version of the effect | Excellent — thinner chain means sharper edge | Minimalist aesthetic, clean look |
| Initial / Letter Anklet | Chain line plus the silhouette of a single letter — less readable than a full name but distinctive | Good — single letter leaves a visible shape | Subtle personalisation with cleaner result |
| Date Anklet | Chain line plus the outline of numbers — readable imprint with a meaningful sequence | Good — numbers create defined edges | Marking a specific date on your body all summer |
| Chunky / Wide Chain | A wider pale band rather than a precise stripe — reads as a block rather than an edge | Moderate — less defined, blurrier edge | Bold look; less precise tan line |
| Beaded Anklet | Patchy, inconsistent — individual beads create gaps that allow inconsistent tanning underneath | Poor — uneven result | Not recommended for deliberate tan lines |
The clear recommendation: a custom name anklet with a fine chain and a flat nameplate. The chain creates the clean perimeter line; the nameplate leaves a legible outline of your name in the skin — a tan line no one else in the world has. For a date instead of a name, our date anklet produces the same distinctive effect with a meaningful number sequence.
How to Get an Anklet Tan Line — The Practical Guide
The tan line only forms where the anklet sits consistently against the skin. Position your anklet just above the ankle bone — the most visible and flattering placement — and wear it in the same position every day. Any shift in position blurs the edge. A fine chain with an adjustable clasp allows you to set the exact position and lock it there. See our guide on how to wear an anklet for placement guidance.
A tan line is most visible against an even, smooth skin tone. Rough or patchy skin creates an uneven base that makes the tan line look blurred rather than clean. Exfoliate the ankle area lightly 24 to 48 hours before your first sun exposure session, and moisturise the surrounding skin consistently. Smooth, even skin tans more uniformly, which makes the contrast at the anklet line sharper. See our 7-day soft feet guide for a complete pre-summer prep routine.
The tan line develops through accumulated UV exposure over multiple sessions, not a single long day. Four to six hours of ankle exposure per day in summer sun — beach, poolside, outdoor walks in sandals — is sufficient to produce a visible line within 3 to 7 days. The ankle itself receives less direct sun than the top of the foot or the lower leg, so exposure time matters. Keep the anklet on during the sun and remove it in the shade to let you assess progress.
This is the deliberate trade-off the trend requires: sunscreen on the surrounding skin will reduce tanning and slow the formation of the contrast you want. Most people getting an anklet tan line apply SPF to the top of the foot and the rest of the leg, but reduce or skip application directly around the anklet area. Be aware that this is a UV exposure choice with associated skin health considerations — limit total daily unprotected exposure time, and apply SPF to the anklet area on any day you’re not actively developing the tan line.
The tan line only stays distinct if you continue wearing the anklet in the same position throughout the summer. If you remove it for days at a time, the protected skin begins to catch up with the surrounding tan and the contrast fades. A waterproof anklet that you can wear swimming, showering, and sleeping removes the temptation to take it off and ensures the line stays consistent.
The self-tanner alternative: For a tan line without UV exposure, apply self-tanner to the surrounding ankle area while the anklet is on (protect the anklet or remove it, apply tanner, let develop, then position the anklet over the lighter area). Reapplication every 4 to 7 days maintains the effect. The result is temporary but achievable regardless of season or climate.
How It Looks on Different Skin Tones
Fair skin tans most visibly with even moderate sun exposure, so the contrast between tanned and protected skin develops within a few days. The tan line will be the most visually pronounced on lighter skin tones — but it will also fade the fastest as the tan diminishes. Moisturise aggressively to slow fading.
Medium and olive skin tones produce arguably the most visually pleasing anklet tan lines — the contrast is clear without the stark white appearance that very fair skin produces, and the tan holds for longer after the summer ends. The time to develop is slightly longer than fair skin but the result is more durable.
On deeper skin tones, the tan line will be less visually dramatic but still present — a tone variation rather than a sharp contrast. The line is most visible in certain lighting conditions, particularly in natural light at an angle. The effect tends to be longer-lasting because deeper skin tones retain colour differences for longer.
Maintaining Your Skin While Developing the Tan
Sun exposure at the ankle dries out the skin more than most people expect. A tan line on rough or flaky skin looks patchy and less defined than the same line on smooth, hydrated skin. These habits maintain both the skin quality and the clarity of the tan line throughout the summer.
- ✦Moisturise immediately after sun exposure. Apply a hydrating body lotion or urea-based foot cream to the ankle area every evening after sun. The skin is most receptive to hydration immediately after bathing and sun exposure. This maintains the smooth skin surface that makes the tan line edge look clean rather than blurred.
- ✦Exfoliate lightly twice a week. Light exfoliation with a pumice stone on dry skin removes the dead surface layer that can make tanning uneven and the tan line edge look ragged. Do this before sun exposure, not after, and avoid over-exfoliating — removing too much skin removes the tan along with it. See our at-home spa pedicure guide for the full sequence.
- ✦Avoid long soaks in the days after a good tan session. Extended soaking in hot water softens the outer skin layer and accelerates fading of the tan. Keep showers brief and at a moderate temperature during the active tan-building phase. Rinse the anklet after seawater or pool exposure and pat dry.
- ✦Keep heels smooth. The heel and lower ankle area is prone to roughness, and rough patches tan inconsistently. A consistent soft-foot routine using urea cream and overnight moisturising keeps the skin even enough for the tan to develop uniformly around the anklet position.
- ✦Don’t exfoliate aggressively if you want to keep the line. Once the tan line is established, avoid heavy exfoliation of the tanned area — this will fade the tan faster. Maintain moisture, keep the surrounding skin smooth, and exfoliate only the non-tanned area to keep the base even.
How to Photograph and Show It Off
The anklet tan line is one of those details that rewards good photography — it can look stunning in the right conditions and almost invisible in the wrong ones. These approaches reliably capture it well.
- ✦Shoot in natural side light. Directional light from the side — window light or late afternoon sun — creates shadow definition that makes the tone contrast between tanned and untanned skin more visible. Flat overhead light washes out the detail. The complete feet photography guide covers the lighting setup in full.
- ✦Use the 45-degree side angle. A side profile shot at ankle height shows both the tan line stripe and the anklet positioned above it — the full story of how the two relate. This is also the angle that shows the arch most flatteringly. Remove the anklet for half your shots to show the tan line itself; keep it on for the other half to show the cause.
- ✦Pair with nail colours that complement the warm tan. Warm terracotta, burnt coral, or deep berry tones photograph beautifully alongside a sun-tanned ankle. See our guide to nail colours that work with gold anklets — the same warm-toned palette that pairs with gold jewellery also complements tanned skin.
- ✦Shoot with and without the anklet in the same session. The most effective content pairing is: anklet on (showing the jewellery and the tan context) and anklet off (showing the tan line itself). The combination tells the complete story and performs better across platforms than either shot alone.
- ✦Sand or natural ground backgrounds enhance the summer reading. Shooting with sand, stone, or natural outdoor textures underneath reinforces the outdoor-life narrative that makes the tan line aesthetically meaningful. White bedding works for the close-up detail shot; natural ground works for the contextual image.

Waterproof, tarnish-resistant, free engraving — designed to stay on through every beach day, swim, and sun session. The finest chain produces the cleanest tan line. The nameplate produces the most personal one.
Shop Custom Anklets →