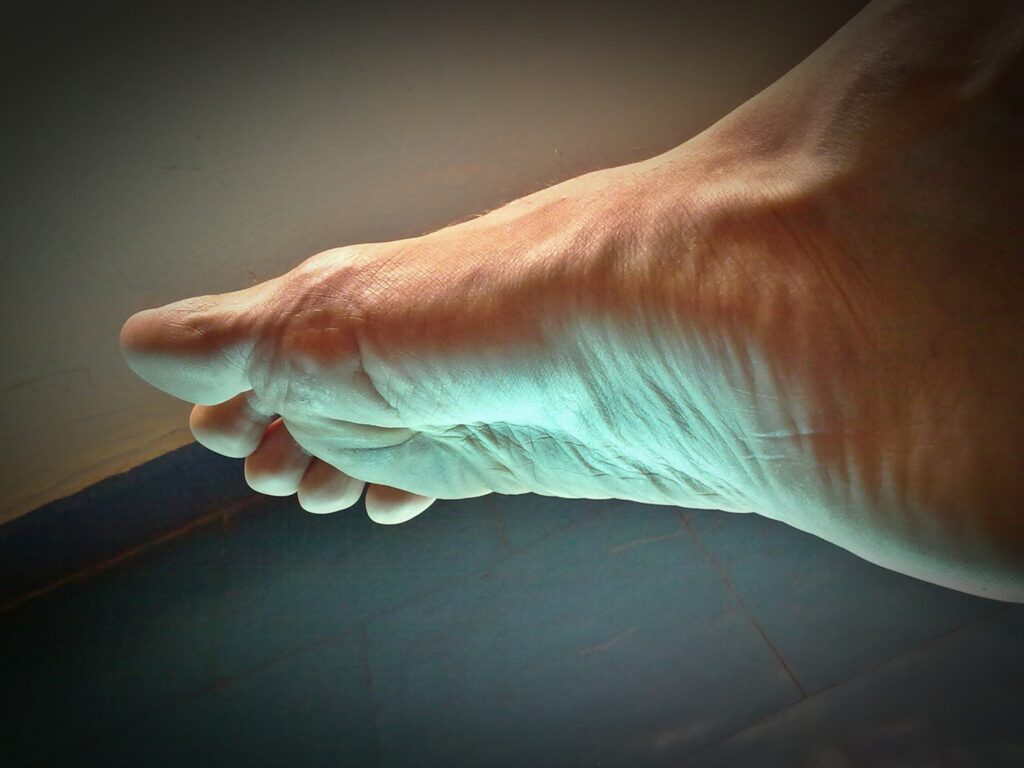
Wrinkled Soles Content:
Why It Sells and How to Shoot It
Wrinkled soles content is one of the most consistently underserved niches in feet photography. Demand is real, supply is limited, and buyers who want this specific aesthetic are willing to pay significantly more than the standard catalogue rate — particularly for custom content.
The technique is straightforward: soak for 20 to 30 minutes, shoot immediately, use side lighting, and position deliberately. The six poses in this guide cover every major variation buyers ask for.
Most foot content is shot on dry, groomed skin under soft frontal lighting. That’s the mainstream approach, and it produces content that competes with thousands of creators producing the same thing. Wrinkled soles occupy a different space — a sub-niche with dedicated buyers, lower creator competition, and a strong demand for custom content that can’t easily be replicated by scrolling to the next profile.
The appeal isn’t niche in the sense of obscure — it’s niche in the sense of specific. Buyers in this category are looking for natural texture, arch definition, and the visual depth that only comes from a sole that has been soaked and positioned correctly. This guide covers why that demand exists, how to prepare for this type of shoot, the six positioning techniques that produce the strongest results, and how to build a sustainable catalogue around this content type.
Why Wrinkled Soles Content Sells
Understanding what buyers in this sub-niche are actually responding to helps you produce content that meets their expectations rather than guessing. These are the seven reasons wrinkled soles content consistently converts:
The mainstream of feet content is smooth, groomed, and edited. Wrinkled soles offer the opposite — natural, unfiltered texture that buyers read as genuine and unmanipulated. The appeal is authenticity, not imperfection.
Sole wrinkles and arch lines read beautifully in macro and close-up photography. The fine detail rewards buyers who zoom in — which is exactly the interaction pattern that leads to repeat purchases and custom requests.
Pruney, water-soaked feet have a distinct visual quality that buyers actively search for — soft skin, deep folds, and a natural sheen that doesn’t exist in dry-skin content. It’s a recognisable aesthetic with its own dedicated community.
Wrinkled soles create their own shadow and highlight patterns under directional light. The folds act as natural contour lines that give images a three-dimensional depth that smooth soles cannot produce, regardless of how the light is positioned.
Most creators don’t shoot wrinkled soles content consistently, which means buyers seeking it have a smaller pool of options. Less competition translates directly into better discovery, higher conversion rates, and more leverage on pricing.
Wrinkled soles buyers frequently request custom content — specific soak lengths, particular angles, or content that combines sole texture with other elements. Custom requests in this niche command a meaningful premium over standard catalogue prices.
Buyers who specifically seek textured sole content develop preferences for individual creators whose anatomy and shooting style matches what they’re looking for. Once they find a match, they return — and they spend more per visit than first-time buyers.
Buyers reward intentional styling. A name anklet sitting just above the wrinkled texture adds a focal point and tells buyers this is a deliberate, custom-quality shoot rather than a casual snap — exactly the presentation that supports premium pricing and repeat custom requests.
Shop Custom Anklets →Pre-Shoot Preparation: Getting the Texture Right
The quality of wrinkled soles content depends almost entirely on preparation rather than editing. You cannot replicate post-soak texture in post-production — it has to be there when you shoot. These four steps produce consistently strong results:
- 1Prepare the skin before soaking
Start with clean, moisturised skin. Well-hydrated skin produces deeper, more defined wrinkles when soaked than dry or flaky skin does — the cellular structure retains more water and responds more visibly to prolonged immersion. A light exfoliation and moisturising session the day before shooting produces noticeably better texture on camera. For a full skin preparation routine, see our 7-day soft feet guide.
- 2Soak for 20 to 30 minutes in warm water
This is the core of the preparation. Warm water at a comfortable temperature — not scalding — produces the most consistent results. Cold water produces minimal wrinkling; very hot water can cause redness that reads poorly on camera. Twenty minutes produces visible texture; thirty produces deeper, more pronounced folds for buyers who specifically request heavy wrinkling. Add a few drops of any oil to the water if you want a slight sheen on the skin after removing your feet.
- 3Pat lightly — don’t dry completely
After the soak, remove excess dripping water with a light pat but leave the skin slightly damp. Completely dry skin loses its wrinkle definition within a few minutes as the surface layer evens out. The optimal shooting window is the first 5 to 10 minutes after exiting the water — the texture is most defined during this period. Have your camera, tripod, and lighting set up before you start soaking so you can move directly into shooting.
- 4Set up side lighting before you soak
Side lighting — coming from a 45-degree angle rather than directly above or in front — creates shadows within the folds and highlights the raised areas of the sole, making the texture visibly three-dimensional. Soft, diffused side light from a window with a sheer curtain or a ring light at an angle is the standard. Direct overhead light flattens the texture entirely; it’s the most common lighting mistake in this type of content. Prepare the lighting before you start soaking so you can begin shooting the moment you’re ready.
The quality of your wrinkled soles content starts days before the soak. Consistently moisturised, well-maintained skin responds more visibly to soaking and holds texture definition longer during the shooting window. Our 7-day soft feet guide covers the full routine.
Read the Guide →6 Foot Positions That Maximise Sole Texture
Each of these positions emphasises a different aspect of sole texture. Testing all six after a single soak session gives you a complete set of variations without requiring multiple preparation rounds.
Curling the toes inward compresses the ball of the foot and concentrates folds across the arch and the area just below the toes. This position produces the highest density of visible lines in a single frame — ideal for buyers who specifically want detailed texture rather than a full-sole view.
Shooting tip: Move the camera close and aim for the area between the ball and the arch. This is where the fold concentration is highest. Use macro focus if your phone supports it.
Extending the foot with toes pointed downward stretches and elongates the sole, creating a different wrinkle pattern — longer lines running from heel to toe rather than the compressed folds of a curled position. Under directional side lighting, the elongated arch area develops strong shadow definition that gives images a clean, dramatic quality.
Shooting tip: This position works particularly well with the camera positioned at ankle height shooting toward the sole. The elongation of the foot combined with the wrinkle lines creates a visually balanced frame.
Pressing the sole lightly against a flat surface — a glass panel, a smooth tile wall, a bathtub side — forces natural compression across the entire foot simultaneously. The pressure creates a distinct wrinkle pattern that no posed position can fully replicate. Glass is particularly effective because you can shoot through it from below, capturing the sole in contact with the surface.
Shooting tip: Use light, even pressure rather than full body weight — you want compression, not flattening. Soft textured surfaces like bedsheets create a different pattern than hard flat surfaces; both are worth shooting in the same session for variety.
Lightly crossing one ankle over the other with the soles facing the camera creates a balanced, visually interesting composition that shows both feet simultaneously. The wrinkle patterns on each sole complement each other without competing, and the slight angle difference between the two feet adds visual variety within a single frame.
Shooting tip: Keep the cross loose rather than tight — a relaxed overlap looks natural; a rigid cross reads as stiff. This position works well as an establishing shot before moving into closer single-sole detail work.
Kneeling with the soles facing upward allows body weight to naturally compress the arch and heel areas, creating deep fold definition that can’t be replicated by manual positioning. The compression is organic — it looks exactly like what it is — which gives this position a realism that buyers in the textured-sole niche consistently respond to.
Shooting tip: Position the camera directly behind the feet at sole level for the most impactful angle. A tripod is almost mandatory here — the camera position is too low and specific to hold steady by hand. The heel-to-toe line should run through the centre of the frame.
Tilting the foot slightly inward to expose the arch area from the side reveals the foot’s natural arch line and the wrinkle patterns along the inner edge of the sole. This angle is particularly effective for macro photography and for buyers who are specifically interested in arch anatomy rather than the full sole surface.
Shooting tip: Side lighting works especially well with this position — position the light on the opposite side from the camera so that it rakes across the arch from behind, creating strong shadow definition in the folds. This is often the most artistically striking composition in a wrinkled soles session.
Practical workflow: Set up your lighting and camera position before soaking. Soak for 25 minutes. Pat lightly and move immediately into your shoot. Work through all six positions in sequence — the whole set takes about 8 to 10 minutes, well within the optimal texture window. You’ll have a complete variation set from a single preparation session.
Building a Wrinkled Soles Content Catalogue
Consistent output is what converts interest into income in any niche. A single strong session is a sale; a well-organised catalogue of wrinkled soles content is a loyal buyer base. These habits make the difference:
- ✦Organise content into thematic galleries rather than posting individual images. Group by content type — water-soaked sets, dry-texture close-ups, position-specific collections — so buyers can navigate to exactly what they want without scrolling through everything. Organised galleries consistently produce higher average order values than individual photo browsing.
- ✦Use descriptive titles and captions that accurately reflect what’s in each image. Terms like “wrinkled soles,” “sole texture,” “soaked feet close-up,” and “arch detail” match what buyers in this niche are actually searching for. Write naturally — accurate description that serves the buyer is more effective than keyword-dense text that reads like a list.
- ✦Open custom requests explicitly in your profile bio. Buyers who want wrinkled soles content will frequently have specific requests — soak duration, position, angle, with or without nail polish, sole condition. State clearly that you take custom orders and include your base rate. This signals availability and removes the hesitation that stops potential buyers from asking.
- ✦Batch your shooting sessions to reduce preparation overhead. Each soak produces an optimal shooting window of 8 to 10 minutes. Planning six to eight distinct setups before soaking — lighting tested, tripod positioned, angles decided — allows you to produce a full week’s content from a single session.
- ✦Post consistently rather than in batches. Spacing uploads across the week keeps your profile active on platform discovery feeds and gives returning buyers new content to find. One or two uploads per day from a batch session is more effective for visibility than uploading everything at once.
- ✦Vary your content within the niche. Soaked versus dry texture, close-up detail versus full sole, different positions and surfaces, different lighting setups — buyers who purchase one style will often buy another if they’re presented as part of the same coherent catalogue. Variety within a consistent niche identity is how loyal buyers stay engaged over time.