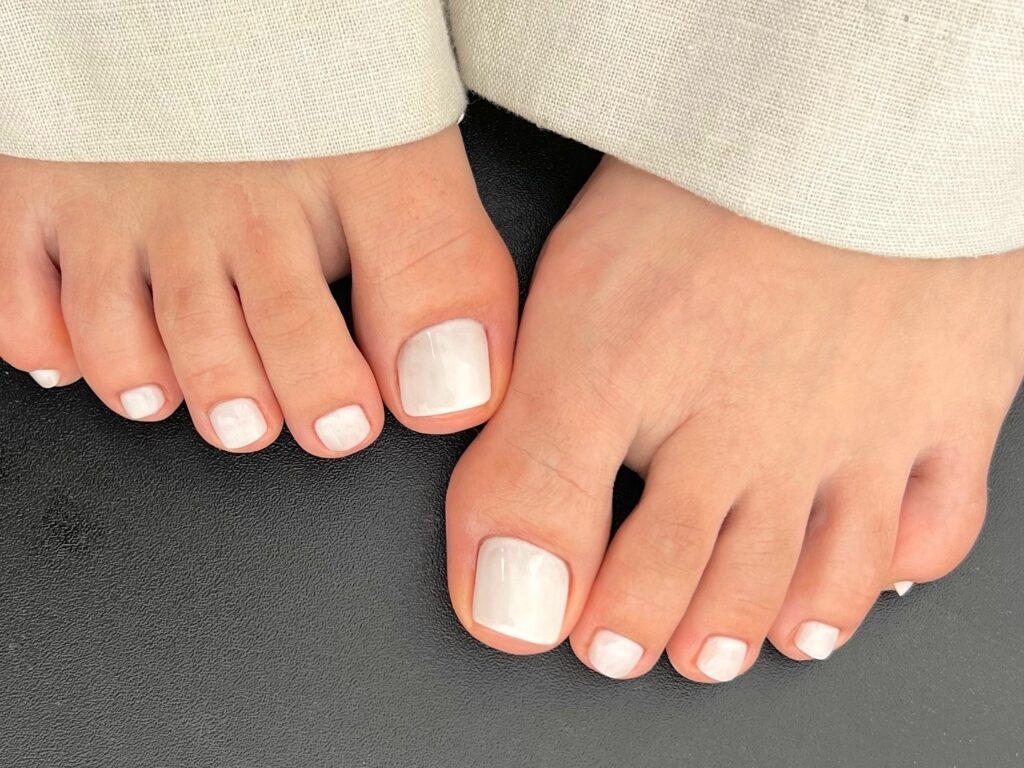
Toe Nail Art Ideas
You Can Do at Home
The most achievable at-home toe nail art designs — in honest order of difficulty — are: solid accent nails, dot designs, French tip variations, ombre/gradient, geometric stripes, floral details, and marble effects.
The most common mistake in home nail art is attempting a design before the base polish is fully dry. A tacky surface turns any detail work into a smear. Wait the full recommended drying time and use a topcoat as your final seal regardless of which design you choose.
Most nail art tutorials online are designed for fingers — longer nails, more surface area, and an easier viewing angle. Toenails are smaller, harder to reach, and often shorted than fingernails, which means some techniques that work perfectly on fingers don’t translate well to toes. This guide is specifically written for toenails, with honest assessments of what’s genuinely achievable at home versus what looks simple on camera but requires salon-level skill in practice.
Each design below is rated by difficulty, tool requirement, and how well it holds on toes over time. The difficulty ratings are honest — not optimistic.
What You Actually Need
- ✦Bobby pin or toothpick — the most versatile nail art tool available for free. Use the rounded end for dots, the pointed tip for fine details and corrections.
- ✦Striping tape or regular tape — for creating clean straight edges on French tips, geometric designs, and negative space looks. Available at beauty supply stores; regular sellotape works for most designs.
- ✦Makeup sponge (small piece) — for ombre and gradient effects. A torn corner of a beauty blender or foam sponge works identically to specialist nail sponges.
- ✦Fine detail brush (optional) — a thin nail art brush or a thin paintbrush from a children’s art set gives you more control for floral details and fine lines than a standard polish brush.
- ✦At least two polish colours — most designs only require a base colour and one accent shade. A topcoat is non-negotiable as the final step for any nail art design.
Designs by Difficulty Level
Solid accent nail · Dot designs · Simple colour blocking · Single stripe
French tip · Ombre gradient · Half-moon · Negative space · Simple florals
Marble effect · Fine line geometric · Water decals · Detailed nail art
The Designs: Step by Step
The simplest nail art available: nine toes in one colour, the big toe in a contrasting or complementary shade. No tools, no technique, no waiting for layers to dry before moving on. The effect reads as deliberately styled rather than accidental — two coordinated colours always look more intentional than one.
- Choose a base colour for the nine smaller nails and a contrasting accent for the big toes. The accent can be bolder (a terracotta base with a deep berry big toe) or more subtle (a nude base with a warm white big toe).
- Apply the base colour to all ten nails first, let dry completely.
- Apply the accent colour to both big toes only. Two thin coats.
- Topcoat over everything.
Colour pairing rule: The accent shade should be from the same colour family as the base, or at least the same colour temperature. A warm nude base with a warm terracotta accent reads as intentional; a warm nude base with a cool blue accent reads as mismatched.
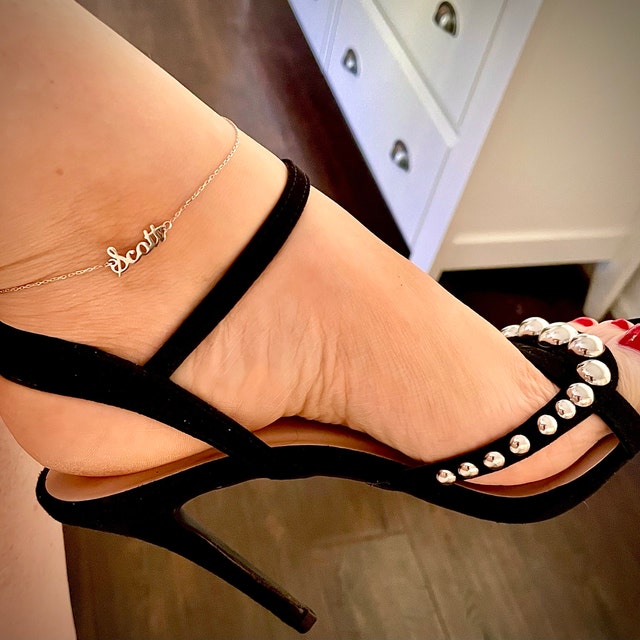
A gold marble nail on the big toe, a warm terracotta on the rest, and a custom name anklet catching the light above them. Each element is simple. Together they look considered.
Shop Anklets →Dots are one of the most forgiving nail art techniques — minor imperfections read as part of the design rather than mistakes, and the tool is free. A single dot at the base of a nail (half-moon dot), a cluster of three small dots at the tip, or a scatter of dots across the big toe are all achievable on a first attempt.
- Apply and fully dry the base colour. Wait longer than you think necessary — tacky polish turns dot detail into a smear.
- Dip the rounded end of a bobby pin into a small pool of accent polish poured onto a piece of foil. The foil keeps the polish fresh and allows you to control the dot size.
- Tap the bobby pin onto the nail in the chosen position. Don’t drag — tap straight down and lift straight up.
- Let dots dry for 3 minutes before applying topcoat.
Size control: The size of the dot is determined by how much polish is loaded on the pin and how much pressure you apply. Test on a piece of foil before touching the nail. Reload the pin after every 2 to 3 dots to keep size consistent.
The classic French tip — sheer base, white free edge — is achievable at home with tape as a guide. The 2026 version opens up the colour range: a terracotta base with a cream tip, a nude base with a gold tip, or a coloured base with a white tip in a thinner-than-classic line all read as modern and deliberate rather than traditional.
- Apply a sheer base colour and let dry completely. This step is essential — tape applied over wet or tacky polish pulls the base off when removed.
- Cut a small strip of tape and place it just below the free edge at the angle you want the tip line. Straight across for classic; slight curve for a softer look.
- Apply the tip colour (white, cream, gold, or coloured) to the exposed free edge above the tape. One thin coat is usually sufficient on small toenails.
- Let become just tacky (about 60 seconds), then remove the tape slowly at a low angle toward yourself.
- Apply topcoat carefully over the tip line to seal the edge.
Gold tip variation: A warm nude base with a gold or champagne tip pairs beautifully with gold anklets — the metallic tip catches light in the same register as the jewellery, creating a cohesive warm-metal look across the whole foot.
An ombre gradient fades one colour into another across the nail. On toes, the most flattering version is a subtle transition between two closely related shades (a light nude fading into a deeper peach, or a pink fading into a warm mauve) rather than a dramatic light-to-dark contrast. The sponge technique is genuinely achievable at home — the key is working quickly while both colours are still wet.
- Apply a white or very light base coat and let dry fully — this makes the gradient colours show up more clearly.
- Pour a small amount of both colours onto a piece of foil, placed next to each other with a slight overlap in the centre.
- Dab a torn piece of makeup sponge into both colours simultaneously, so the sponge picks up both shades.
- Dab the sponge onto the nail with a gentle up-and-down motion — do not drag. The overlap of the two colours on the sponge creates the gradient transition.
- Apply 2 to 3 layers for opacity, letting each become tacky before the next. Clean up edges with a cotton bud dipped in remover.
- Seal with topcoat.
Honest assessment: The first attempt at ombre rarely looks perfect. It’s a forgiving technique that improves quickly with practice. If the gradient looks muddy rather than blended, the two colours are too far apart in value — choose shades that are closer to each other.
The version of florals that’s achievable at home is a simplified, impressionistic take rather than a realistic detailed flower. Five dots arranged in a circle with a single smaller dot at the centre produces a flower shape that reads clearly at a glance — no fine brush required, just the bobby pin technique from the dot design section.
- Apply base colour and dry completely.
- Using the bobby pin dot technique, place 5 dots in a rough circle — they don’t need to be perfectly even. The brain completes the flower shape even with slight irregularity.
- Add a smaller central dot in a contrasting colour (white centre on pink petals, gold centre on white petals).
- Let dry 3 to 5 minutes before topcoat.
- For a more detailed version: use a thin detail brush to pull petal shapes from a central point outward, rather than individual dots.
Scale note: On the big toe, a single flower at the base of the nail looks intentional. On smaller toes, a single dot in a contrasting colour reads as a simplified floral — which is often more elegant at this scale than a complex design.
The marble effect produces a sophisticated, organic stone pattern using a thin brush and two colours — typically white with grey veining, or a warm cream with gold veining for a more luxe look. It’s the most impressive of the home nail art designs and the most forgiving of imperfection, since real marble is itself irregular. The key is using thin, slightly wandering lines rather than trying to draw straight or controlled strokes.
- Apply a white or cream base and let dry completely.
- Using a thin detail brush or toothpick, paint thin irregular lines across the nail in grey, gold, or a darker shade of the base colour. Lines should be diagonal and slightly curved — they should look like they flow, not like they were drawn with a ruler.
- While the lines are still wet, drag a dry brush or toothpick lightly across them at a perpendicular angle. This smudges the lines slightly and gives them the blurred quality of real marble veining.
- Add a few smaller branching lines off the main veins.
- Dry for 5 minutes, then seal with a glossy topcoat. High shine enhances the marble illusion significantly.
Gold marble variation: A cream base with fine gold veining pairs beautifully with a gold anklet — the warm metal tone in the nail art picks up the same colour from the jewellery, creating a cohesive luxe look across the whole foot.
The rule that applies to all of these: Nail art on toes is smaller, harder to reach, and viewed from further away than finger nail art. Designs that look complex and impressive at distance are almost always simpler to execute than they appear. The designs that look overworked at distance are usually the ones that took the most time. Restraint is your best technique.
Making Nail Art Last as Long as Plain Polish
Nail art doesn’t have to chip faster than plain colour. The longevity principles are the same — the only addition is that detailed designs benefit from a slightly thicker topcoat application to seal all the texture created by layered colours.
Apply a generous topcoat that slightly overflows onto the surrounding skin at the edges — this creates a complete seal that prevents lifting from the sides. Clean any overflow with a cotton bud dipped in remover once the topcoat is fully dry. Refresh the topcoat every 3 to 4 days as you would with any pedicure. For the complete longevity guide, see How to Make Your Pedicure Last 3 Weeks.